


This guide breaks down exactly how to defend takedowns in MMA using the cage, with proven tricks like wall walks, underhooks, and the whizzer. We’ll also talk wrist control, scrambling, and how to stay calm under pressure when you’re trapped in a tight spot.
Understanding Cage Wall Defense In MMA
Fighting against the cage might look like a dead end, but it’s actually where some of the smartest defenses happen. The wall becomes your third arm, helping you balance, frame, and recover. In high-pressure moments, cage awareness is what separates seasoned fighters from overwhelmed rookies. When used right, it can turn defense into offense in seconds.
Definition
Cage wall defense is a group of techniques fighters use when they’re trapped against the cage, aiming to avoid being taken down. Instead of just absorbing pressure, the fighter uses cage support, smart angles, and body mechanics to resist the takedown and begin the escape. It’s a skill that turns the cage into a survival tool.
Why It’s Important
The cage offers more than just a boundary. It gives fighters leverage to stay on their feet and reposition. Whether it’s pressing hips into the wall or pushing off with the feet, the cage is often the reason a takedown fails. It adds structure to chaos and gives defenders a moment to breathe or counter.
Key Components
The three major tools in MMA cage wall defense are underhooks, whizzers, and wall walks. Underhooks let you lift and off-balance the attacker. Whizzers help shut down double-legs and slow pressure. Wall walks let you climb back to your feet. Mastering these tools is how you learn how to escape takedowns during cage pressure.
When To Use It
You use cage wall defense when your back hits the fence and your opponent starts shooting. This is when balance, posture, and grip fighting become key. Whether they go for a single-leg or double-leg, the moment you feel pressure, it’s time to dig underhooks or start your wall walk.
Related Article: Mastering Boxing Techniques: Your Ultimate Guide to Becoming a Better Boxer
The Wall Walk Technique: How To Escape Takedowns
The cage isn’t just a backdrop, it’s a weapon. And when you’re stuck against it, the wall walk is your get-out-of-jail card. It’s gritty, it’s technical, and when timed right, it flips control. Fighters learn this move to avoid the worst — being stuck flat and eaten by ground and pound. Instead, you rise, reset, and reclaim the fight.
Definition
The MMA wall walk technique is used when a fighter is grounded near the cage and wants to stand up without giving up position. You use the wall as leverage, combining pressure through the hips and controlled movement to shift from flat to standing. It’s a foundational escape every serious fighter drills into muscle memory.
Execution
Start by planting one foot firmly on the cage. At the same time, drive your hips into the opponent while framing with your arms. Then walk your back up the wall like climbing steps. As soon as you gain balance, turn inward toward the cage center and break free.
Why It Works
The wall gives you something solid to press into when you’re grounded. Instead of muscling out randomly, you’re using technique, friction, and timing. That upward push neutralizes your opponent’s weight and gives you the space to escape or even counter. It’s one of the cleanest ways how to escape takedowns when your back’s to the fence.
Common Mistakes
Skipping the hip drive is the biggest error. If your hips stay flat, your opponent just follows you up. Another mistake is using arms too much or panicking. Stay calm, use your legs, and keep your back close to the cage as you walk upward.
Underhook Vs. Takedown: How To Use The Underhook In Cage Defense
The battle of underhook vs takedown is a classic one in MMA. When you’re stuck on the cage and your opponent is pushing hard, the underhook gives you the leverage to fight back. It’s not just a block, it’s your anchor, your steering wheel, your reset button. Learn to dig that underhook and you won’t be easy to put down.
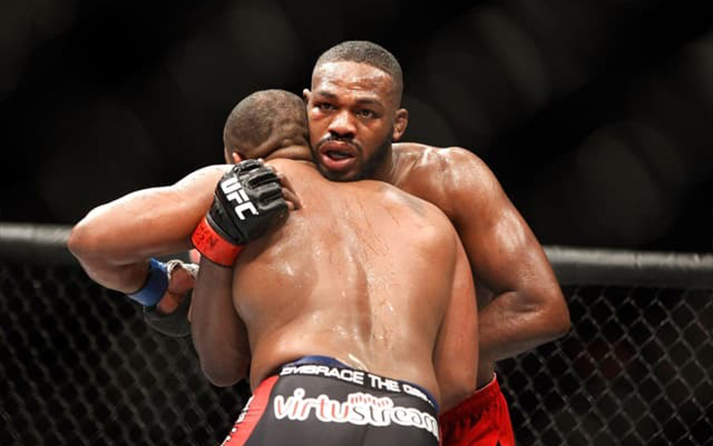
Understanding The Underhook
An underhook happens when you slip your arm under your opponent’s and raise it to control their upper body. It sounds small, but it’s a big game-changer. It limits their drive and stops them from locking up your legs. With the underhook locked in, you’re not stuck — you’re in control.
Why The Underhook Is Effective
This grip takes away your opponent’s posture and makes their takedown weaker. You’re forcing their body upright and away from your hips. That gap kills their momentum. In terms of how to defend takedowns in MMA, the underhook is one of the top tools in the cage.
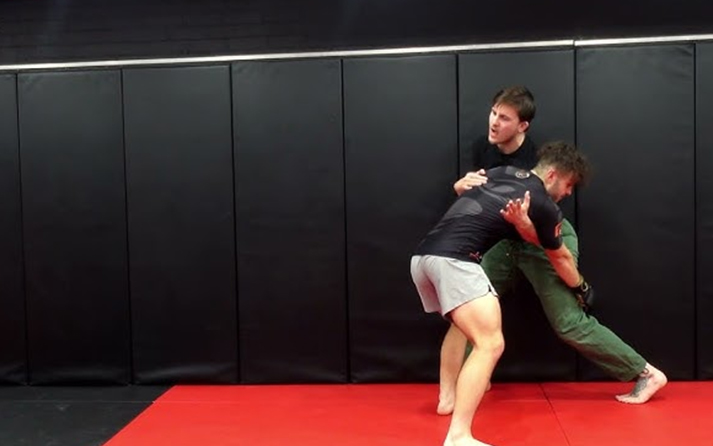
How To Use The Underhook In The Cage
Start digging for it the second you feel them push into you. Use your underhook to lift, frame their head with your free hand, and walk your hips away. From there, you can pummel for inside position or transition into a wall walk. Always keep pressure, never let them settle.
Related Article: Advanced Kickboxing Techniques to Improve Your Strikes
Whizzer Defense: Using The Whizzer To Control The Opponent
When your back hits the cage and your opponent drops low, the whizzer might be your last line of defense. It’s a sneaky, powerful tool that lets you stay upright, create angles, and even reverse pressure. Learning how to use the whizzer properly is a must for anyone serious about how to escape takedowns and maintain cage control.
What Is The Whizzer?
The whizzer is when you loop your arm over your opponent’s underhooked arm and apply downward and outward pressure. It looks simple, but it’s one of the slickest moves in the book. In tight spaces like the cage wall, it can break momentum and give you control again.
How To Execute The Whizzer
As soon as your opponent underhooks and drives in, dig your overhook tight and sprawl your hips. Use your whizzer arm to tilt their posture and steer them off-line. From there, you can start peeling off the cage or setting up your own counter.
Why The Whizzer Works
It disrupts the opponent’s base and balance, making it harder for them to complete the takedown. Combine that with strong hips and you’ve got a solid answer to their pressure. It’s a core piece of smart MMA cage wall defense.
Wrist Control In Takedown Defense
When your opponent starts reaching for legs or hips, the hands are where it all begins. If you break the grip before it locks in, you break their whole plan. That’s where wrist control comes in. It’s simple, effective, and can flip defense into offense real quick.
What Is Wrist Control?
Wrist control is exactly what it sounds like. Controlling the wrists before they become handles for a takedown. You catch the grip before it catches you. Fighters who master wrist control can block takedowns before they even start.
How To Use Wrist Control
Grab the opponent’s wrist as soon as they shoot in or try to tie up. Push it down, move it away from your legs, or feed it into an underhook. Pair it with a strong base and you’ve got a wall they can’t break.
Why Wrist Control Is Effective
It stops your opponent from securing grips. Without control of your legs or waist, their takedown options shrink fast. You create openings to sprawl, reset, or even counter with your own attack. That’s why top fighters rely on wrist control MMA and sharp MMA scrambling techniques.
Cage Wrestling Techniques For Takedown Defense
Cage wrestling isn’t just freestyle wrestling with a wall behind you. It’s a unique skill set, built for MMA chaos. With the cage, you’ve got tools — a surface to lean on, push off, frame against. Mastering those tools makes the difference between getting slammed and staying on your feet.
Cage Wrestling Overview
Cage wrestling blends clinch work, balance, and control while using the cage for leverage. It’s where wrestling meets strategy. Fighters use it to stay up, reverse bad positions, and grind out wins against the wall.
How To Use Cage Wrestling For Takedown Defense
First, position your back to the cage and stay upright. Frame with your forearms and create space with your hips. Constantly pummel to win inside control — whether it’s an underhook or a whizzer — and never stop adjusting. It’s a chess match that demands constant focus.
Training Cage Wrestling
You drill the same moves over and over: wall walks, underhooks, pummels, and footwork. That’s how champions sharpen their edge. Without cage wrestling MMA, even great grapplers get stuck on the fence.
MMA Scrambling Techniques To Escape Takedowns
Sometimes a takedown is halfway in. Maybe your opponent has a grip. Maybe you’re off balance. That’s when scrambling saves you. It’s messy, quick, and instinctive. But when done right, scrambling turns losses into escapes — or even reversals.
What Is Scrambling?
Scrambling is the art of rapid recovery. It means moving, adjusting, reacting — all without getting stuck. When your opponent starts dragging you down, you start shifting. That’s a real test of your fight IQ.
How Scrambling Works In Takedown Defense
As soon as they get your legs or hips, use bridges, hip escapes, or wall leverage to fight back up. You don’t stay flat. You don’t settle. Scrambling breaks their rhythm and stops clean takedowns in their tracks.
Scrambling Drills
Work with a partner, simulate bad positions, and move nonstop. Make it second nature. That’s how you sharpen your MMA scrambling techniques and learn how to escape takedowns in live scenarios.
Conclusion
If you want to stay off the mat, MMA cage wall defense has to be in your toolbox. Use the wall, own the underhook, crank the whizzer, and scramble like your belt depends on it. Learn how to escape takedowns before they happen, and you’ll keep the fight right where you want it — standing, dominant, and in control.


